Why Is My Home Office Echoing During Zoom Meetings? Guide
The rapid transition to residential remote work has made video conferencing a primary medium for professional communication. However, many home offices are established in spare bedrooms, basements, or minimalist spaces that lack acoustic engineering. During digital conferences, a frequent and disruptive technical issue is the generation of vocal reflections, or echoes. This sound distortion occurs when a participant’s voice bounces uncontrollably around the room, compromising audio clarity and making communication strained or unprofessional for remote listeners.
Understanding the root mechanical and environmental causes of speech distortion is essential for restoring clear audio channels. When a remote worker diagnoses why is my home office echoing during zoom meetings, they are dealing with a combination of room physics and hardware routing loops. This comprehensive guide breaks down the science of acoustic reflection, evaluates key sound-absorption methods, details practical room layout configurations, and outlines long-term tracking strategies to ensure clean, echo-free presentation audio.
Overview of Why Is My Home Office Echoing During Zoom Meetings
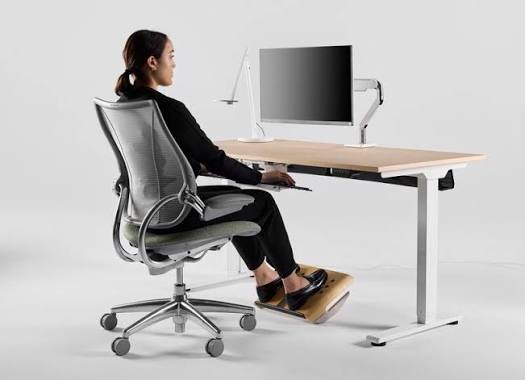
To accurately diagnose why is my home office echoing during zoom meetings, one must look at the physical behavior of sound waves inside an enclosed space. Sound waves travel outward from a speaker’s mouth at roughly 1,130 feet per second. When these waves hit large, hard, unyielding surfaces—such as bare drywall, hardwood floorboards, large glass window panes, or metallic desk frames—they cannot absorb. Instead, they bounce back into the room, creating a phenomenon known as flutter echo or reverberation.
[Speaker Mouth] ----> Hard Drywall Surface ----> (Reflected Bounce) ----> [Microphone Intake]
At the same time, this architectural echo interfaces with hardware routing loops during digital calls. If a worker uses open computer speakers alongside an external microphone, the microphone picks up the remote participant’s voice coming out of the speakers and routes it straight back into the call. The software tries to suppress this feedback loop using automatic echo cancellation (AEC). However, if the room’s physical reverberation time ($RT_{60}$) is too high, the bouncing sound wave outlasts the software’s buffer window, slipping into the live stream. Fixing this issue requires balancing physical room absorption with strategic hardware configuration.
Core Categories of Audio Reflection Interventions
Fixing vocal reflections involves a tiered approach, combining immediate soft furnishings with engineered acoustic panels and direct audio settings tweaks.
Acoustic Intervention Category Comparison
| Category / Type | Description | Common Use Case | Time / Cost / Effort Level |
| Porous Absorption Panels | Mounting dense, open-cell foam or fiberglass boards on bare walls to trap sound waves. | Enclosed rooms with large patches of exposed, uncarpeted drywall. | Moderate cost; simple hanging installation; high physical reduction. |
| Soft Domestic Furnishings | Adding thick area rugs, heavy velvet drapes, and fabric upholstered seating to a space. | Multi-use rooms or rental spaces where building custom panels is restricted. | Variable cost; immediate layout execution; low manual effort. |
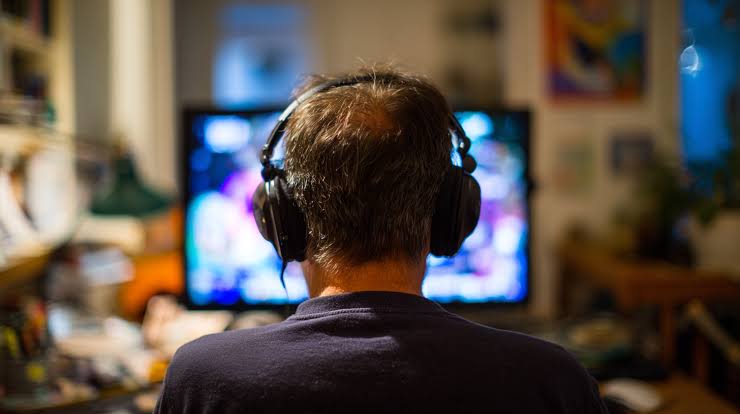
| Hardware Isolation Routines | Shifting from open speakers to isolated over-ear headphones or directional headsets. | Fast-paced environments requiring an immediate fix without altering furniture. | Low to moderate cost; instantaneous execution; lowest effort. |
| Software Filter Customization | Adjusting digital suppressions, advanced noise gating, and high-level echo loops inside the app. | Spaces dealing with persistent background hums or unpredictable low noise. | Free; immediate app setup; zero physical labor. |
Selecting the ideal category depends on the source of the echo. If the sound distortion stems entirely from a hardware feedback loop where your microphone is catching your laptop’s speaker output, hardware isolation routines provide an instant fix. If the echo is caused by physical room physics—where your voice actively rings or hums inside a bare, empty room even when your computer is muted—you must invest in porous absorption panels or soft domestic furnishings to dampen the room’s hard reflection surfaces.
Practical Scenarios and Acoustic Applications
The way sound waves behave varies depending on the layout, flooring, and wall dimensions of your workspace. Below are three common configuration scenarios.
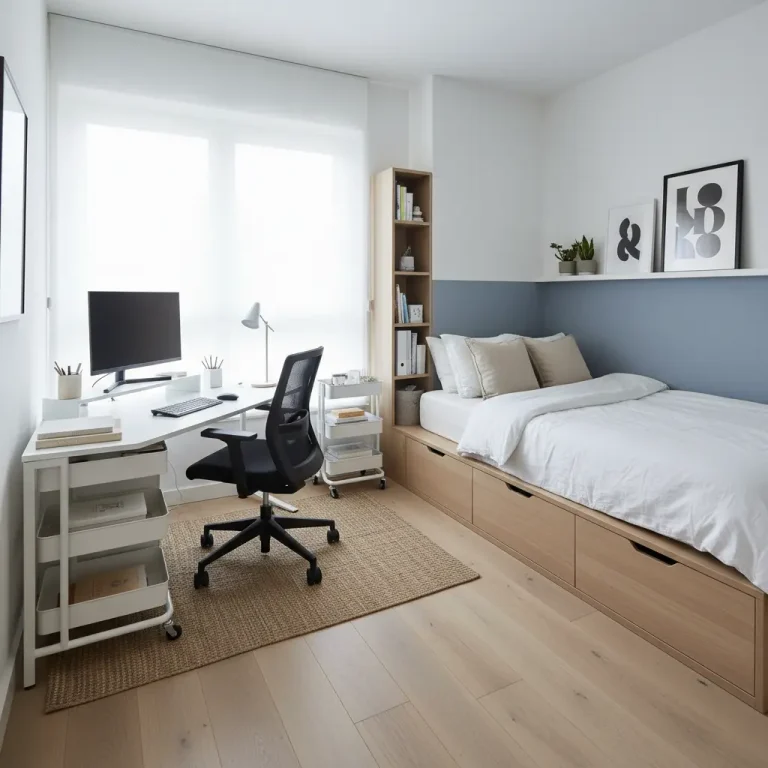
Scenario 1: The Hardwood / Minimalist Spare Bedroom Office
This scenario features a remote worker operating from a sparse, modern room characterized by large patches of bare drywall, tall windows, and polished wood or laminate flooring.
-
Actionable Layout Steps:
-
Place a thick, high-pile area rug underneath the desk and task chair footprint to damp floor bounces.
-
Hang multi-layered fabric blackout drapes completely over the glass window frames.
-
Mount a cluster of three dense, 2-inch thick acoustic fiberglass panels on the wall directly opposite your desk.
-
-
Why Relevant: Hardwood floors and bare glass act as acoustic mirrors. Adding soft rugs and thick window drapes absorbs early reflections, preventing sound waves from bouncing repeatedly between the floor and ceiling.
Scenario 2: The Enclosed Subterranean Concrete Basement
This setup involves an office built in a finished basement where the walls are painted concrete or thick drywall backed by solid foundational masonry, creating deep, boomy sound issues.
-
Actionable Layout Steps:
-
Install open-cell acoustic foam panels flat across the wall surface directly behind your monitor screen.
-
Place a fabric upholstered sofa, storage futon, or heavy bean-bag chair in the corner of the room to function as a passive bass trap.
-
Position a directional cardioid microphone within 6 to 12 inches of your mouth, pointing the dead zone away from the open room.
-
-
Why Relevant: Low-frequency vocal hums accumulate heavily in rigid masonry corners. Placing dense fabric furniture in corners breaks up this low-end build, while a close directional microphone prioritizes your direct voice over room echo.
Scenario 3: The Shared High-Ceiling Loft Space
A professional works out of an open, airy loft or high-ceiling apartment space where sound travels long distances upward and creates a continuous, stadium-like echo.
-
Actionable Layout Steps:
-
Wear a pair of over-ear headphones or an isolated headset during call blocks, turning off open desktop speakers completely.
-
Set up tall, fabric-wrapped freestanding divider screens directly behind your workspace chair.
-
Open your digital meeting app audio settings and turn the native background noise suppression level to “High.”
-
-
Why Relevant: High ceilings make it difficult to control room reflections using wall panels alone. Utilizing headphones completely breaks the speaker-to-microphone feedback loop, while software filters clip out the remaining background air reflections.
Contextual Comparison
These three setups differ based on their primary acoustic boundaries. Scenario 1 relies on soft floor and window coverings to balance a highly reflective, minimalist space. Scenario 2 uses dense corner furniture and close microphone placement to control deep, boomy reflections in a rigid room. Scenario 3 relies on personal hardware isolation and software clipping to bypass the echo challenges of massive, open high ceilings.
Sourcing, Sizing, and Financial Planning Considerations
Successfully deadening a room requires strategic resource allocation. Buying cheap, lightweight foam tiles online and scattering them randomly will not stop heavy vocal waves from bouncing. Planning your budget around dense, verified absorption materials ensures long-term audio clarity.
Workspace Acoustic Budget Model
| Category | Component Item Examples | Estimated Cost Range | Operational Purpose & Sizing Rule | Optimization Tips |
| Primary Wall Traps | Dense fiberglass or rockwool acoustic panels (2-Pack). | $60 – $150 | Mounted at ear level to absorb mid-frequency vocal sound paths ($250\text{Hz}$–$1000\text{Hz}$). | Prioritize fabric-wrapped rigid panels over thin packaging foam; fiberglass holds up to three times more absorption power. |
| Personal Isolation | USB Cardioid Condenser Microphone or Headset. | $40 – $120 | Narrows the pickup zone to capture only your direct voice while blocking side-room echo paths. | Look for a microphone that features a physical gain control knob to dial back the input sensitivity. |
| Floor Damping | High-pile woven wool or plush felt area rugs. | $50 – $200 | Breaks up flat, parallel reflections between hard floorboards and flat ceilings. | Place a thick felt pad layer underneath the rug to maximize its sound absorption capacity. |
| Ecosystem Monitors | Standard standalone computer headphones. | $20 – $60 | Breaks the speaker feedback loop completely, keeping incoming audio isolated to your ears. | Models fitted with a physical mute switch let you cut off background room sounds instantly when not speaking. |
Note: The price ranges and component configurations detailed in this matrix serve as general market examples for the year 2026. Actual retail costs can change based on your location, material density, and custom room layout choices.
Audio Customization Tools and Support Systems
Several specialized tools and hardware configurations can help remote workers optimize their audio presentation and eliminate echo triggers.
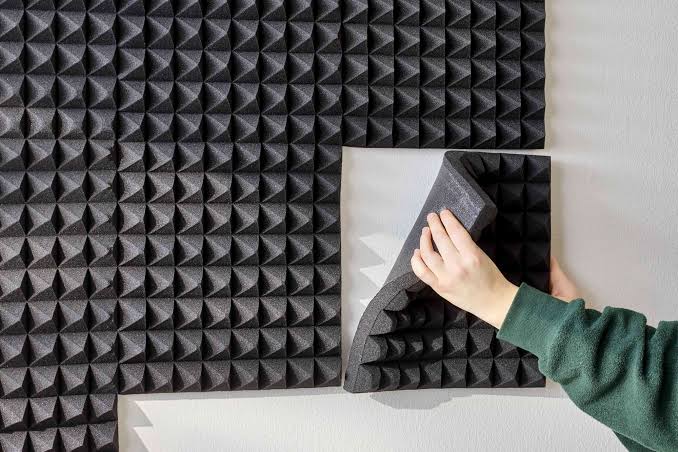
1. Rigid Fiberglass Acoustic Panels
Panels constructed from compressed semi-rigid fiberglass wrapped in acoustically breathable fabric covers.
-
Advantages: Offers the highest Noise Reduction Coefficient (NRC) available; exceptionally effective at capturing the precise frequencies of the human voice.
-
Disadvantages: Noticeably heavier to mount safely on walls compared to featherweight foam tiles; carries a higher upfront purchase cost.
2. Cardioid Directional Microphones
Microphones engineered with an intentional heart-shaped pickup pattern, capturing sound from the front while blocking audio from the sides and rear.
-
Advantages: Focuses sharply on your voice; ignores reflections bouncing off back walls or surrounding furniture.
-
Disadvantages: Requires you to stay seated within a steady, close distance of the capsule to maintain consistent volume levels.
3. Integrated Noise-Cancellation Software Engines
Digital audio processing cards built into communication applications that run advanced voice-tracking algorithms.
-
Advantages: Completely free; immediately suppresses continuous background sounds like air conditioning hums, computer fans, or distant traffic.
-
Disadvantages: Heavy software suppression can sometimes cause your voice to sound compressed, metallic, or digital if the room echo is too severe.
Common Audio Risks, Errors, and Safety Challenges
When trying to fix a room’s acoustics, individuals often make common configuration errors that can ruin their audio or lead to new software bugs.
-
Gluing Cheap Packaging Foam to Walls: A widespread mistake is buying thin, featherweight polyurethane foam tiles online and expect them to stop echoing. Thin foam has almost zero density; it only stops high-frequency clicks but lets vocal wavelengths pass right through, leaving the room sounding muddy and boomy. Mitigation: Always use dense, 2-inch thick fiberglass or dense felt panels rated with a minimum NRC score of 0.75.
-
Running High Microphone Input Gain: Setting your microphone input sensitivity (gain) too high forces the capsule to hunt for faint sounds, pulling in distant wall reflections and background family noises. Mitigation: Drop your input gain slider down to 50–60% and move the physical microphone closer to your mouth, ensuring it catches your direct voice cleanly.
-
Leaving Laptop Speakers Active: Attempting to conduct calls using a separate high-end microphone while keeping your laptop’s built-in open speakers active frequently triggers an audio feedback loop that overloads the app’s echo filters. Mitigation: Always connect headphones to completely isolate incoming audio paths away from the live microphone capsule.
-
Placing the Workspace in a Perfect Spatial Center: Setting your desk exactly in the geometric center of a square room positions your voice at the focus point of all four walls, amplifying reflections. Mitigation: Offset your desk slightly to one side of the room centerline to break up uniform wave reflection paths.
Ongoing Best Practices and Long-Term Acoustic Upkeep
Maintaining an optimized audio environment requires regular care, as changing household items and software updates can slowly shift your settings out of alignment.
Ongoing Workspace Calibration Checklist
-
Every Sunday Shift: Clear clutter and hard plastic bins away from your immediate desk perimeter, as large bare surfaces act as minor reflection points.
-
Monthly Software Inspection: Check your digital meeting application settings to confirm that “Automatic Echo Cancellation” and “Noise Suppression” remain toggled active.
-
Bi-Annual Fastener Checks: Tighten the mounting anchors on wall panels to ensure they stay secure and flush against your drywall.
-
Pre-Meeting Audio Checks: Spend 30 seconds inside your app’s native audio preview window before important client calls to verify that your voice line prints clean, crisp, and clear of echo.
Tracking and Documenting Workstation Audio Quality
Because audio quality can drift over long shifts due to changing ambient noise levels or software updates, keeping a simple record of your settings helps maintain a reliable presentation layout.
Tips for Logging Audio Comfort
Keep a basic text document on your desktop. Every time you change your microphone placement, adjust software filters, or add wall absorption, log the date and details of the modification. Record feedback from coworkers regarding your audio clarity over the next two weeks.
Real-World Audio Quality Records
-
Example 1 (Uncalibrated Initial Status Log): “March 11: Desk sitting in an empty spare bedroom with bare wood floors. Running open laptop speakers and internal microphone. Colleagues reported a severe, hollow echo during today’s Zoom meeting. Voice sounds like I am speaking inside a tiled bathroom. Audio quality: 2 out of 10.”
-
Example 2 (Post-Calibration Progress Log): “March 25: Added a thick center area rug, mounted two rigid fiberglass panels at ear height, and switched to an isolated headset line. Coworkers reported complete elimination of speech echo. Audio prints crisp, clear, and highly professional. Audio quality: 9 out of 10.”
Frequently Asked Questions (FAQ)
1. Why does a room still echo during calls when the door is closed?
Closing an office door keeps outside family noise from entering, but it does not stop your voice from bouncing around inside your workspace. If your office walls, floor, and ceiling are made of hard, bare materials, your voice will continue to reflect off those flat surfaces back into your microphone, requiring you to add soft, absorbing materials to quiet the space.
2. Can hanging canvas paintings on the wall help reduce room echo?
Standard canvas paintings offer very minimal sound absorption because they are hollow panels wrapped in thin, non-porous paint layers that still reflect mid-frequency vocal waves. However, you can easily turn a canvas print into a highly effective acoustic panel by stuffing the hollow backside tightly with a 1-inch thick layer of dense acoustic denim insulation or recycled felt padding before hanging it back up.
3. What is the difference between soundproofing and sound absorption?
Soundproofing is the process of physically blocking sound from traveling between separate rooms, which requires heavy, dense structural materials like thick walls and sealed doors. Sound absorption is the process of controlling sound reflections inside a single room, which uses porous materials like foam or fiberglass panels to trap bouncing sound waves, clean up echoes, and maximize microphone clarity on your calls.
Closing Summary
In conclusion, understanding why is my home office echoing during zoom meetings reveals a direct link between physical room reflection boundaries and technical hardware feedback loops. By breaking the open speaker-to-microphone link with isolated headphones and mounting dense fiberglass panels at ear height to absorb sound waves, you can easily remove the physical stressors that distort your voice. Combining these smart layout updates with proper microphone gain calibration ensures a comfortable, healthy, and highly professional digital presence over the long term.