How Much Space Do You Need for a Comfortable Desk Setup?
The configuration of a physical workspace involves a careful analysis of spatial boundaries, human anatomy, and functional equipment requirements. When designing a workstation, individuals often focus heavily on the aesthetic qualities or technical specifications of their hardware, while neglecting the fundamental footprint required for comfortable daily use. Operating in a space that is physically restricted compromises neutral joint alignment, constricts necessary movement, and leads to long-term musculoskeletal fatigue, chronic strain, and decreased cognitive stamina.
Establishing precise spatial boundaries is essential for protecting systemic physical health and sustaining professional focus over extended periods. Evaluating how much space do you need for a comfortable desk setup requires an objective calculation of three distinct spatial zones: the immediate desktop surface area, the user’s personal clearance envelope, and the surrounding room transit perimeter. This educational guide breaks down the biological and structural mechanics of office space planning, details configuration metrics for common hardware setups, maps out step-by-step practical applications, and outlines a comprehensive framework to optimize your physical workspace footprint.
Overview of How Much Space Do You Need for a Comfortable Desk Setup
To systematically calculate how much space do you need for a comfortable desk setup, you must look at a workstation as a multi-dimensional clearance envelope. Biomechanically, your workspace configuration must accommodate your body’s functional reach zones without forcing you to lean forward, twist your spine, or slouch. Anthropometric data establishes that a comfortable desk footprint cannot be determined by the size of the computer alone; it must incorporate the natural range of motion of your limbs while typing, reclining, and sliding your task chair backward safely away from the table edge.
An effective layout divides space into two critical physical fields:
-
The Desktop Field (Horizontal Depth and Width): A baseline comfortable depth ranges from 24 to 30 inches, which provides the minimum distance needed to position a monitor an arm’s length away, protecting your eyes from focal strain. The width should measure between 48 and 72 inches to support your keyboard, mouse, and side paperwork seamlessly.
-
The Floor Envelope (Vertical and Clearance Depth): Beneath the desktop surface, you must secure a clear floor depth of at least 42 to 48 inches behind the front edge of the desk. This space is required to roll your task chair backward smoothly, adjust your seating angle, and enter or exit the desk footprint without hitting your knees on structural framing or trapping your legs against rear walls.
Core Workstation Footprint Classifications
Workstations are categorized into distinct structural classes based on their overall hardware load, physical mobility demands, and spatial footprints.
Spatial Footprint Category Matrix
| Category / Type | Description | Common Use Case | Time / Cost / Effort Level |
| Compact Laptop Nook | Surface width: 36–42 inches; depth: 20–24 inches. Clearance envelope is highly restricted. | Secondary alcoves, closets, or shallow bedrooms where space is at a premium. | Budget-friendly cost; immediate 1-hour setup time; minimal effort. |
| Standard Single-Screen Task | Surface width: 48–54 inches; depth: 24–30 inches. Standard industry footprint. | Remote home offices or standard corporate cubicles holding a single monitor and laptop. | Moderate cost; low installation time; baseline setup effort. |
| Ultrawide / Dual-Screen Studio | Surface width: 60–72 inches; depth: 30 inches. Expanded horizontal boundaries. | Technical developers, graphic editors, or financial analysts running massive displays. | High equipment investment; requires careful planning; moderate effort. |
| L-Shaped Corner Executive | Dual surface wings stretching 60–72 inches on each side; depth: 24–30 inches. | Dedicated corner rooms requiring separate zones for computer typing and paperwork reading. | Premium cost; complex multi-hour assembly; high physical effort. |
To choose between these spatial categories, analyze the physical dimensions of your required hardware alongside your daily task profile. If your professional duties are entirely digital and limited to typing on a single laptop screen, a standard single-screen task footprint provides ample room without overwhelming a shared space. However, if your workflow demands multiple large displays or regular handling of physical blueprints and paper binders, you must prioritize an ultrawide studio or L-shaped configuration to prevent overlapping gear from forcing you into cramped, non-ergonomic postures.
Practical Scenarios and Spatial Applications
The physical layout required to guarantee structural comfort changes based on your room’s design and your specific hardware configurations. Below are three common spatial scenarios.
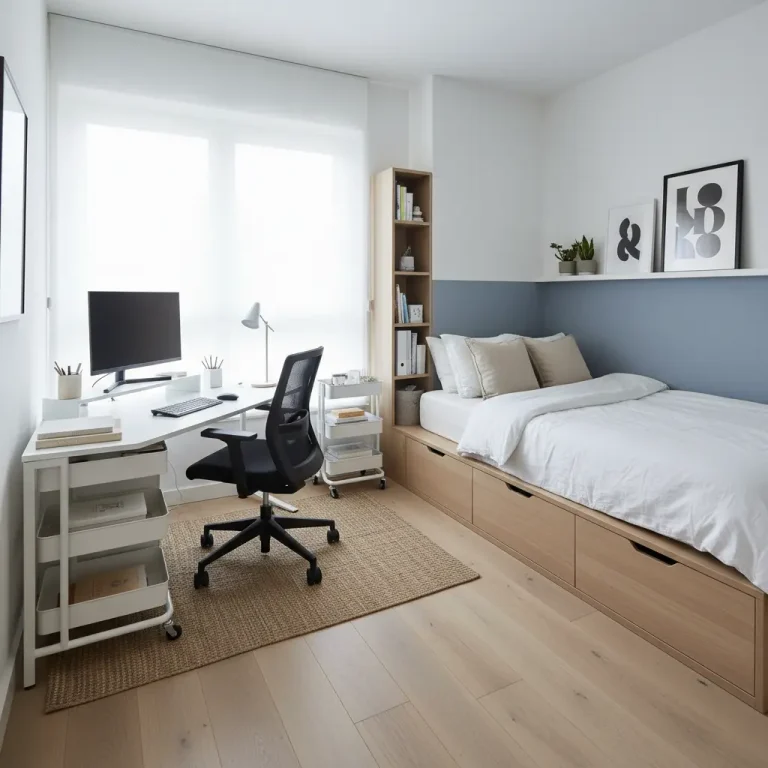
Scenario 1: The Shallow-Alcove Residential Workspace
This layout features a compact remote office built inside a shallow bedroom niche or hallway alcove, where maximizing floor space is the primary challenge.
-
Actionable Layout Steps:
-
Select a desk measuring exactly 42 inches wide by 24 inches deep.
-
Mount the computer monitor to a mechanical articulating wall bracket to lift the stand base completely off the wood desktop.
-
Slide a low-profile task chair completely underneath the desk pan when the shift ends to keep the hallway clear.
-
-
Why Relevant: When depth is limited to 24 inches, removing the bulky monitor stand is mandatory to maintain a safe viewing distance of at least 20 inches between your face and the screen glass.
Scenario 2: The Multi-Screen Developer Workstation
This environment involves a software engineer or data specialist running two 27-inch monitors side-by-side along with a separate computer tower, operating from a dedicated spare bedroom.
-
Actionable Layout Steps:
-
Procure a solid-core desktop measuring 60 inches wide by 30 inches deep.
-
Clamp a heavy-duty dual-monitor desk arm to the back center edge to hoist both displays above the table surface.
-
Position the computer tower chassis on a rolling cart on the floor next to the desk leg rather than on top of the desk.
-
-
Why Relevant: A width of 60 inches ensures both 27-inch displays can sit side-by-side without hanging over the edge of the table, while a 30-inch depth provides the necessary physical room to clear your keyboard, mouse, and wrist rests cleanly.
Scenario 3: The Sit-Stand Motorized Dynamic Office
A professional utilizes a height-adjustable motorized desk to switch continuously between a sitting and standing posture multiple times a day.
-
Actionable Layout Steps:
-
Deploy an adjustable frame fitted with a 54-inch by 30-inch top.
-
Route all power strips and device wires into an under-desk horizontal mesh wire tray.
-
Secure a minimum clearance gap of 2 inches between the desk edges and all surrounding walls, shelves, or windowsills.
-
-
Why Relevant: Motorized desks change heights continuously; keeping a 2-inch perimeter safety gap stops the moving desk from crushing surrounding items or pinning power cords against walls during downward adjustments.
Contextual Comparison
These three setups differ based on their primary spatial constraints. Scenario 1 manages limited room depth by moving hardware off the desk surface. Scenario 2 scales up horizontal width to handle a heavy multi-screen technical setup safely. Scenario 3 prioritizes vertical clearance boundaries and mechanical movement safety, proving that figuring out how much space do you need for a comfortable desk setup requires tailoring your physical boundaries to your specific hardware mechanics.
Sourcing, Spatial Audits, and Cost Considerations
Procuring office furniture requires performing a detailed physical audit of your room before making an online purchase. Buying a large desk based on price alone without verifying your room’s wall boundaries can block doors, trap heat vents, or create a cramped workspace that is painful to use. Investing in accurate diagnostic measurements first protects your financial capital.
Workspace Sourcing and Spatial Implementation Budget
| Category | Component Item Examples | Estimated Cost Range | Operational Purpose & Sizing Rule | Optimization Tips |
| Diagnostic Sizing | Flexible tape measure and chalk painter’s tape. | $10 – $20 | Used to map out the proposed desk footprint directly onto the floorboards before purchasing. | Tape the desk outline on your floor and sit inside the zone with your chair for a day to test real-world clearances. |
| Ergonomic Surface | Solid-core wood or high-density laminate desktop. | $150 – $450 | Establishes the primary horizontal work surface area ($48\text{”}$–$60\text{”}$ wide by $30\text{”}$ deep). | Avoid thin hollow-core doors; they can bow or crack if you clamp a heavy monitor arm to the back edge. |
| Mechanical Lift | Telescoping dual-motor steel lifting frame. | $250 – $600 | Regulates the vertical height range ($25\text{”}$ to $51\text{”}$) to align your elbows to a healthy $90^{\circ}$ typing angle. | Look for a frame featuring a three-stage lifting system; it provides a wider vertical range for tall and short users. |
| Cable Management | Under-desk steel trays and mesh net organizers. | $20 – $50 | Anchors and stores large laptop power bricks and multi-plug strips flat against the underside of your desk. | Grouping your wires underneath the desk clears up vital floor space, making it easy to vacuum and clean your room. |
Note: The baseline financial figures and component upgrade estimates shown here serve as general market examples for the year 2026. Actual retail costs can fluctuate depending on your regional retail network taxes, chosen material options, and custom manufacturing requirements.
Strategies for Optimizing Limited Spatial Footprints
Several specialized tools and design choices can help professionals maximize their available room footprint without sacrificing ergonomic comfort.
-
Mechanical Articulating Monitor Arms: Clamping a gas-spring monitor arm to the rear edge of your desk lets you hoist your screen completely above the table surface. This reclaims up to 20% of your horizontal workspace by removing bulky plastic factory stands.
-
Under-Desk Retractable Keyboard Trays: Installing a slide-out tray beneath your desktop lowers your typing height to a healthy 28 inches. This allows a shallow 24-inch desk to function like a deeper 30-inch surface, keeping your input devices completely out of sight when your shift finishes.
-
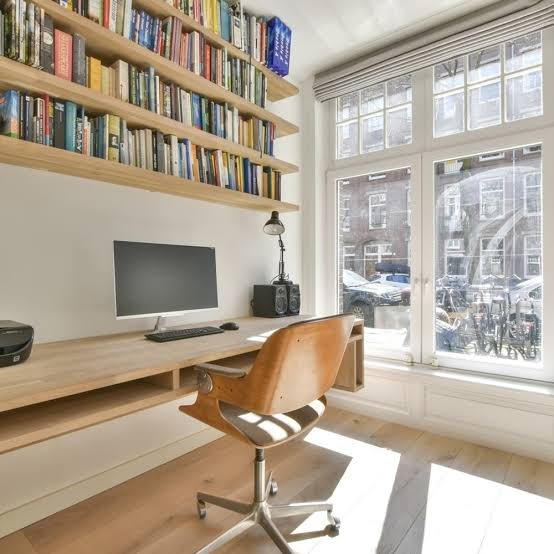
Vertical Wall Shelving Arrays: Moving books, reference binders, and storage bins off your main desktop and placing them onto floating wall shelves utilizes vertical room height effectively, keeping your immediate table surface clear and uncluttered.
-
Under-Desk CPU Rolling Caddies: Placing heavy computer towers on a rolling cart underneath or next to your desk frame frees up massive amounts of desktop real estate, allowing you to use a narrower desk safely.
Common Spatial Risks, Physical Bottlenecks, and Safety Hazards
When setting up your workplace layout, it is easy to make subtle configuration mistakes that can lead to physical strain, equipment damage, or personal injury.
-
The “Knee-Knocking” Drawer Trap: Selecting a shallow desk fitted with bulky built-in lower storage drawers often blocks your legroom. This forces you to sit twisted or spread your legs uncomfortably wide, leading to hip tilt and severe lower back pain. Mitigation: Ensure the area directly beneath your main keyboard zone stays completely free of permanent wooden panels or drawers, securing a minimum thigh clearance height of 10 to 12 inches.
-
The Trapped Standing Desk Cord Tearing: Forgetting to check your cable slack before lifting an adjustable desk can rip device ports out or break internal copper wiring as the table rises. Mitigation: Connect all electronics to a single heavy-duty surge protector mounted underneath the desktop, ensuring only one main power cord drops down to the wall outlet with plenty of loose slack.
-
Operating a Monitor Too Close to the Face: Squeezing a large 32-inch screen onto a shallow 20-inch desk forces you to sit too close to the glass display. This overworks your ciliary eye muscles, leading to rapid digital eye strain, blurred vision, and frequent tension headaches. Mitigation: Maintain a strict viewing distance of at least 20 to 30 inches (roughly an arm’s length) between your face and the monitor glass.
-
Blocking High-Traffic Room Transit Paths: Placing a deep desk in a narrow bedroom layout can leave less than 24 inches of walking clearance behind your chair, creating a dangerous tripping hazard for family members or blocking closet doors. Mitigation: Maintain a minimum room transit boundary of 30 to 36 inches between the back of your workspace footprint and any surrounding walls or doorways.
Long-Term Workspace Management and Spatial Best Practices
Maintaining an optimized workspace requires regular attention, as everyday use and new devices can slowly cause clutter to take over your physical desk.
Ongoing Spatial Upkeep Checklist
-
Every Sunday Evening: Clear clutter and hard plastic bins away from your immediate desk perimeter; keeping your active workspace clear stops distractions and protects your neutral reach zone.
-
Every Six Months: Re-verify that your task chair wheels roll smoothly and check that the underlying floor protector mat hasn’t shifted into walls or baseboards.
-
Bi-Annual Clearance Check: For height-adjustable desks, run the frame completely from lowest to highest once a season to confirm that no new shelves or wall decorations have been placed inside its path.
-
Hardware Swap Upkeep: When adding a new peripheral (like a document scanner or secondary display), take 10 minutes to map out its spatial footprint before clamping it down, ensuring it leaves your primary mouse path completely free.
Documenting and Mapping Workspace Geometry
When building out a technical office or corporate layout, keeping a basic written record of your desk’s dimensions and clearance measurements simplifies future troubleshooting or furniture upgrades significantly.
Tips for Keeping an Ergonomic Log
Create a dedicated text document or digital note on your computer. Write down your desk’s exact height, your saved monitor distance, your chair’s seat height, and your real-world clearance clearances to keep your workspace optimized over time.
Illustrative Spatial Configuration Logs
-
Example 1 (Shallow Alcove Configuration): “Spatial Audit: Workspace restricted to an alcove measuring 46 inches wide. Deployed a 42” x 24” solid birch desktop frame. Screen hoisted via a wall-mounted articulating friction arm to secure a 22-inch face-to-glass distance. Chair clearance footprint mapped to 42 inches of rear depth.”
-
Example 2 (Advanced Dual-Screen Studio Mapped Profile): “Spatial Audit: Configuration built inside an open spare bedroom corner. Primary desktop measures 60” x 30” to hold a side-by-side dual 27-inch display array. Left side wing kept clear for physical document editing. Clearance footprint behind desk rim locked to 48 inches of smooth rolling floor space; transit lane measures 32 inches from closet wall.”
Frequently Asked Questions (FAQ)
1. Can a 24-inch deep desk work safely for someone who is tall?
Yes, a 24-inch deep desk can function comfortably for a tall individual if you modify the hardware layout. To protect your legroom, you must remove any bulky monitor bases or lower drawers that block your knees. Mount your screen to a mechanical monitor arm clamped to the very back edge, and install an under-desk keyboard tray to slide your input devices forward, freeing up deep legroom beneath the table frame.
2. How much clearance space is required directly behind an office chair?
To recline, shift positions, and enter or exit your desk comfortably without hitting obstacles, you need a minimum floor clearance depth of 36 inches behind the front edge of your desk. If your workspace uses a large, deep heavy-duty task chair, scaling this floor envelope up to 42 to 48 inches ensures your wheels roll smoothly without scuffing baseboards or hitting back walls.
3. What is the single most important measurement when selecting an office desk?
While horizontal surface width handles your screen setup, the single most critical ergonomic metric is desk depth. Depth dictates your viewing distance to the screen and determines whether your arms can rest flat at a healthy $90^\circ$ typing angle. Avoid desks with a depth under 24 inches unless you are using a laptop or a wall-mounted display, as narrow surfaces can lead to severe eye fatigue and neck strain.
Closing Summary
In conclusion, calculating how much space do you need for a comfortable desk setup requires balancing your horizontal desktop surface needs with your personal physical clearance boundaries. Aiming for a minimum desk surface depth of 24 to 30 inches ensures a safe viewing distance from your monitor, while securing a clear floor footprint of 42 to 48 inches behind the table gives your task chair plenty of room to roll safely. Combining these precise physical measurements with smart tool tracking ensures a comfortable, healthy, and highly focused workspace over the long term.