Best Monitor Light Bars for Small Home Office Desks: Guide
The configuration of a compact workspace requires careful management of spatial real estate and environmental comfort. In a small home office, traditional incandescent or LED desk lamps frequently present operational drawbacks. Their wide bases consume valuable desktop space, and their symmetric light distribution paths often project light directly onto the glossy display panel of a computer screen, creating veiling reflections or disability glare. This visual interference forces the muscles of the eye to labor continuously, resulting in premature visual fatigue, headaches, and decreased task endurance.
To overcome these structural boundaries, ergonomics and industrial design have prioritized advanced overhead solutions that clamp directly onto existing hardware frames. Utilizing the best monitor light bars for small home office desks represents a highly efficient mechanism for reclaiming physical desktop space while establishing a precise, glare-free optical environment. This comprehensive guide outlines the underlying engineering principles of monitor lamps, compares the primary system classifications available on the market, breaks down practical installation scenarios, and details continuous maintenance practices to maximize long-term eye comfort and professional productivity.
Overview of Best Monitor Light Bars for Small Home Office Desks
To understand how the best monitor light bars for small home office desks improve an environment, one must look at the physics of asymmetric optical pathways. Traditional desk lamps cast light in a uniform, conical pattern ($180^{\circ}$ symmetric distribution). When positioned near a computer screen, this light hits the glass screen and bounces straight into the operator’s eyes, washing out text contrast. A proper monitor light bar solves this by utilizing a custom internal reflector or lens that cuts off the light path at a sharp angle—typically between $18^{\circ}$ and $45^{\circ}$. This asymmetric beam directs light exclusively downward onto the work surface, leaving the monitor glass entirely dark and free of glare.
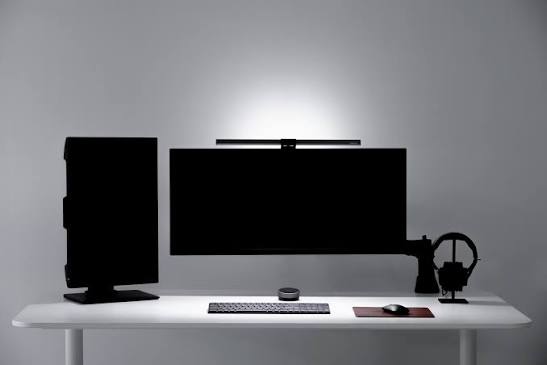
When consumers configure limited office spaces, the common approach is to substitute bulky floor or table fixtures with a single streamlined bar that rests gently on the top bezel of their primary screen. The primary goal of this setup is to achieve an even desk surface illumination level of 300 to 500 lux while preserving every square inch of desktop space for input devices or paperwork. By integrating these systems, users can expect an immediate drop in eye strain, better contrast visibility during long hours of data processing, and an optimized workspace aesthetic that supports focused, productive work.
Primary Categories of Monitor Lighting Systems
Monitor light bars feature distinct mechanical layouts, optical paths, and control configurations engineered for different screen frames and budgets.
Hardware Category Comparison
| Category / Type | Description | Common Use Case | Time / Cost / Effort Level |
| Smart Auto-Dimming Bars | Features an integrated ambient light sensor that adjusts lux levels dynamically based on changing room light. | Workspaces with large windows experiencing regular sunlight changes. | Moderate cost; immediate installation; lowest daily adjustment effort. |
| Wireless Remote-Puck Systems | Employs an independent, battery-powered control puck that sits on the desk to regulate color and brightness. | Users who prefer adjusting settings without reaching up to touch the monitor bezel. | Premium cost; requires occasional remote battery changes; minimal effort. |
| Curved Asymmetric Bars | Built with a physical arc designed to match the specific structural radii of curved gaming or ultrawide screens. | Users running immersive 1000R to 3000R curved monitor profiles. | Moderate to high cost; requires precision alignment; moderate effort. |
| Dual-Illumination Hybrids | Combines an asymmetric front task light with a soft ambient backlight that projects onto the rear wall. | Late-night working environments requiring balanced background contrast. | High hardware cost; quick setup; low daily effort. |
Choosing between these categories depends on your monitor’s shape and when you work. If your desk is positioned flat against a dark wall and you often work late into the night, a dual-illumination hybrid model provides the necessary background light to reduce eye strain. If your priority is keeping your setup as simple and affordable as possible with a standard flat screen, a smart auto-dimming bar with built-in touch buttons handles the essentials effectively without taking up desk space.
Practical Scenarios and Workplace Applications
The benefits of utilizing monitor light bars vary depending on how a compact home office is arranged. Below are three common configuration scenarios.
Scenario 1: The Compact Floating Wall-Desk Setup
This scenario features a minimal desk mounted directly to a wall in a small hallway or bedroom corner, where desktop depth is less than 20 inches.
-
Actionable Layout Steps:
-
Mount a dual-illumination hybrid light bar onto the flat monitor bezel.
-
Adjust the front asymmetric beam so the sharp light cutoff terminates exactly at the front edge of the keyboard tray.
-
Activate the rear ambient backlight to bounce a soft glow off the wall directly behind the screen.
-
-
Why Relevant: When a desk is shallow, a standard lamp base leaves no room for hands or a mouse. The bar removes this footprint while the backlight prevents the severe eye strain caused by staring at a bright screen against a dark wall.
Scenario 2: The Ultrawide Curved Monitor Workstation
This environment involves a remote professional utilizing a single 34-inch curved monitor for large data spreadsheets, operating from a small home office nook.
-
Actionable Layout Steps:
-
Select a specialized curved monitor light bar engineered to match the monitor’s specific curvature (e.g., 1500R).
-
Align the counterweighted mounting clip gently over the top center bezel without pinching the delicate screen matrix.
-
Route the USB power cable cleanly along the back of a articulation monitor arm to preserve space.
-
-
Why Relevant: Placing a standard straight light bar on a deeply curved screen causes the ends of the bar to stick out past the bezel, casting shadows or creating glare on the sides of the display glass.
Scenario 3: The Multi-Tasking Daytime/Nighttime Shared Hub
An office worker handles physical paperwork, reads hard-copy books, and types on a computer throughout varying daytime and nighttime shifts in a compact room.
-
Actionable Layout Steps:
-
Position a high-CRI (Color Rendering Index of Ra95+) monitor light bar with a wireless control puck on the setup.
-
During daytime hours, set the color temperature to a crisp 5000K to match natural incoming daylight.
-
At sunset, use the wireless puck to smoothly drop the color temperature to a warm, soothing 3000K amber hue.
-
-
Why Relevant: High color rendering (CRI) ensures that physical documents look vibrant and readable, while the adjustable color settings allow the user to easily tune their environment to match changing daytime focus needs and evening relaxation windows.
Contextual Comparison
These three setups differ based on their hardware and spatial challenges. Scenario 1 focuses on building background contrast in an ultra-shallow space using integrated backlighting. Scenario 2 solves the geometric alignment challenge of curved screens to keep lighting paths even. Scenario 3 prioritizes high color accuracy and easy remote adjustments for users switching between physical paper and digital screens, proving that finding the best monitor light bars for small home office desks requires matching features to your daily tasks.
Financial Planning and Resource Allocation
Upgrading your office lighting requires careful planning to ensure components interface correctly. Buying an arbitrary LED bar without checking your screen’s bezel shape or power limits can lead to a wobbly mount or an overloaded computer port. Budgeting for verified specifications protects your tech gear while maximizing eye comfort.
Budget Planning Blueprint
| Category | Estimated Amount / Effort | Explanation | Optimization Tips |
| Core Optical Bar Unit | $40 – $180 / Low Effort | The primary aluminum or polymer asymmetric light bar chosen to match your flat or curved screen type. | Models that feed controls straight onto the bar are generally more budget-friendly than wireless remote puck options. |
| Upgraded Power Delivery | $0 – $20 / Low Effort | A dedicated 5V/1A wall power adapter to supply consistent electricity to the light bar. | Running the bar from an independent wall adapter saves an extra USB port on your computer hub or laptop. |
| Microfiber Surface Care | $5 – $10 / Low Effort | High-density optical cleaning cloths used to keep the light bar’s lower lens free of dust. | Regular dusting stops particles from diffusing the light path and accidentally causing low-level glare. |
Note: The price ranges and component configurations listed in this matrix serve as general market examples for the year 2026 and can change based on your local retail trends, chosen brands, and custom shipping options.
Core Features and Strategic Control Options
Understanding the engineering of specific components allows users to spot high-quality craftsmanship before making a purchase.
1. True Asymmetric Reflectors
Internal optical housings lined with high-reflectivity silver or custom lenses that bend light paths forward at a strict angle.
-
Advantages: Keeps light completely off the monitor glass to eliminate screen reflections; prevents direct light from shining into the user’s eyes.
-
Disadvantages: Requires precise manufacturing tolerances; lower-tier budget options often shortcut this feature, causing light to spill onto the screen.
2. High Color Rendering Indexes (CRI > 95)
LED diodes configured to emit a full, rich light spectrum that closely mirrors the color accuracy of natural sunlight.
-
Advantages: Makes text on physical paper effortless to read; prevents colors from looking gray or washed out on your desk.
-
Disadvantages: Consumes slightly more power; increases the cost of the raw LED components.
3. Weighted Counterbalanced Mounts
Clamping mechanisms that utilize a heavy rear weight to rest the light bar securely on the monitor frame using gravity alone.
-
Advantages: Eliminates the need for sticky glues or tight mechanical screws that could crack or scratch expensive thin screens.
-
Disadvantages: Can block very thick, older style monitors or screens with highly uneven rear housings.
4. Wireless Control Pucks
Battery-powered desktop dials that communicate over 2.4GHz frequencies to adjust brightness and color settings smoothly from your seat.
-
Advantages: Eliminates the need to reach up and push buttons on the bar, preventing the monitor from wobbling or shifting out of place.
-
Disadvantages: Adds a tiny footprint to the desk surface; requires replacing internal batteries every few months.
Common Postural Risks and Operational Mistakes
Even a high-end monitor light bar can fail to protect your eyes if it is installed incorrectly or set to an improper brightness level.
-
Angling the Bar Too Far Inward: Users often tilt the light bar backward to push light deeper onto their desks. This mistake accidentally exposes the internal LED strip, shining light directly into the eyes and causing severe glare and headaches. Mitigation: Twist the bar housing until the lower front lip fully hides the bare LEDs from your direct line of sight.
-
Setting Brightness to Maximum in a Dark Room: Running a light bar at full intensity in a pitch-black room creates a harsh, bright patch on your desk that forces your pupils to work harder against the surrounding darkness. Mitigation: Use an auto-dimming function or lower the brightness manually until the desk light matches the soft ambient light of the room.
-
Clamping the Base onto Integrated Webcams: Forcing a weighted light bar clip directly over a built-in or external webcam can crush delicate camera lenses or block your video frame completely. Mitigation: Choose a light bar model built with a dedicated webcam clearance slot or a high-rise mounting frame.
-
Placing Straight Bars on Highly Curved Glass: Using a standard straight light bar on a curved display forces the outer ends of the tube to hang behind the screen rim, creating bright glare reflections on the sides of the glass. Mitigation: Always match your monitor’s curvature to a specialized curved light bar designed to wrap smoothly around the display.
Long-Term Maintenance and System Calibration
Maintaining an optimized workspace requires ongoing care, as ambient dust and moving parts can slowly pull your lighting setup out of alignment.
Ongoing Workspace Calibration Checklist
-
Every Sunday Shift: Wipe the lower clear lens of the light bar with a dry microfiber cloth to clean away dust that can block or scatter the asymmetric light beam.
-
Monthly Mount Inspection: Confirm that the rear counterweight has not shifted due to desk adjustments, ensuring the bar stays flat and stable.
-
Seasonal Temperature Tweaks: As seasonal daylight shifts, re-program your light settings to ensure cool light prints in the morning and warm light runs in the evening.
-
Power Cable Slack Verification: Check that your USB power cable has enough loose slack if your screen sits on an adjustable monitor arm, preventing cords from pulling taut and tearing ports.
Tracking and Documenting Optical Improvements
Because eye strain and focus drop happen slowly over a long shift, keeping a brief record of your workspace adjustments helps determine which lighting levels provide the greatest comfort.
Tips for Logging Optical Comfort
Keep a simple text note on your computer. At the end of each afternoon, note your total screen hours, your current color temperature setting, and any signs of dry eyes or fatigue to fine-tune your setup.
Real-World Adjustment Records
-
Example 1 (Pre-Light Bar Baseline): “May 12: Working on a small 24-inch desk with a traditional swing-arm lamp. The lamp bulb reflects strongly off the center of the screen, creating a washed-out blur. By 3:00 PM, my eyes felt dry and tired, causing me to slouch forward to read. Eye comfort: 3 out of 10.”
-
Example 2 (Post-Light Bar Calibration): “June 4: Installed an asymmetric monitor light bar set to a crisp 4000K daylight profile. Screen reflections are completely gone, and the entire desk surface is evenly lit. Stayed focused through the late afternoon with zero eye strain or neck fatigue. Eye comfort: 9 out of 10.”
Frequently Asked Questions (FAQ)
1. Will a monitor light bar work safely on a laptop screen?
Generally, standard monitor light bars are too heavy and feature clips that are too wide for ultra-thin laptop lids, which can strain or damage the display hinge. If you work primarily on a laptop from a small desk, look for specialized, lightweight mini-laptop light bars built with spring-loaded, low-pressure clips specifically designed for thin portable frames.
2. Can a monitor light bar be powered by a standard phone charger?
Yes. Most modern monitor light bars operate on standard 5V/1A or 5V/2A direct current power and utilize a standard USB-C or USB-A connection cable. You can safely plug the cord into any standard external smartphone wall brick, power strip USB port, or external battery pack.
3. What is the difference between a cheap LED desk strip and a true asymmetric light bar?
A cheap LED strip or basic clip lamp throws light outward evenly in all directions ($180^{\circ}$ symmetric path), which floods the screen glass with blinding reflections. A true asymmetric light bar uses engineered internal reflectors or custom lenses that shape the light into a precise, angled beam. This directs light straight down onto your paperwork and keyboard while leaving the monitor glass dark and glare-free.
Closing Summary
In conclusion, finding the best monitor light bars for small home office desks comes down to prioritizing precise asymmetric optics that keep light entirely off your screen glass. By using a counterweighted mount that sits on your monitor bezel, these specialized lamps clear away bulky desk fixtures, freeing up valuable space on compact desks. Combining an even, high-CRI light path with smart color temperature adjustments ensures a comfortable, healthy, and highly focused workspace over the long term.