How to Place Smart Lights in Home Office for Low Glare
The configuration of a home workspace involves careful management of spatial parameters, hardware integration, and environmental comfort. While remote professionals often focus extensively on selecting ergonomic office seating or adjusting high-resolution displays, the physical arrangement of light sources is frequently neglected. Poorly positioned illumination inside a workspace introduces critical physiological boundaries, primarily via visual glare. Glare forces the ciliary and extraocular muscles of the eye to overwork continuously to read text through reflections, which results in tension headaches, dry eyes, and premature cognitive fatigue.
Establishing precise control over light waves and reflection angles is essential for maintaining ocular health and daily mental stamina. Learning how to place smart lights in home office for low glare involves a calculated combination of geometric layout, light wave diffusion, hardware selection, and digital scheduling. This comprehensive guide outlines the underlying optical physics of glare generation, compares the primary placement categories available, breaks down practical installation scenarios, and details ongoing system maintenance to achieve a completely optimized, comfortable visual environment.
Overview of How to Place Smart Lights in Home Office for Low Glare
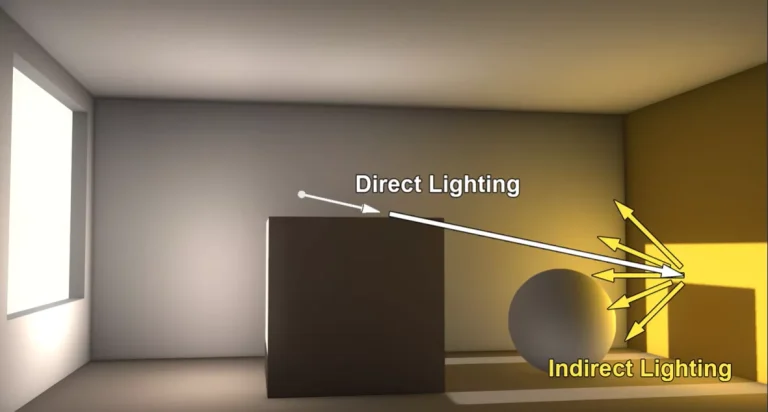
To successfully implement a layout that cuts down on eye fatigue, one must first explore the physics of glare generation. Glare is generally divided into two distinct structural types: direct glare and disability (or discomfort) glare. Direct glare occurs when a high-intensity, unshielded light source sits directly inside the operator’s field of vision, overstimulating the retina. Disability glare happens when light waves strike a smooth, polished surface—such as a glossy monitor screen, a glass desk pad, or a polished wood tabletop—and reflect straight into the eyes, creating a wash-out effect that lowers text contrast.
[Direct Light Source] --------> Angles into Glass Monitor --------> Reflects into Eye (Disability Glare)
[Corrected Light Source] ------> Bounces off Matte Wall ---------> Soft Ambient Diffusion (Low Glare)
The underlying principle of learning how to place smart lights in home office for low glare relies on managing the angle of incidence. According to optical laws, the angle at which a light wave strikes a flat surface matches the angle at which it bounces off ($\theta_i = \theta_r$). When smart LED elements are strategically offset from the monitor’s reflection path and tuned to match ambient room conditions, these sharp glare spots are eliminated. The expected outcome is an even distribution of light across your workspace, maximizing text visibility and letting you focus comfortably through long working shifts.
Primary Placement Categories and Modalities
Achieving a glare-free home office relies on separating your lights into distinct structural layers, ensuring no single bare bulb overrides your field of view.
Smart Light Placement Comparison
| Category / Type | Description | Common Use Case | Time / Cost / Effort Level |
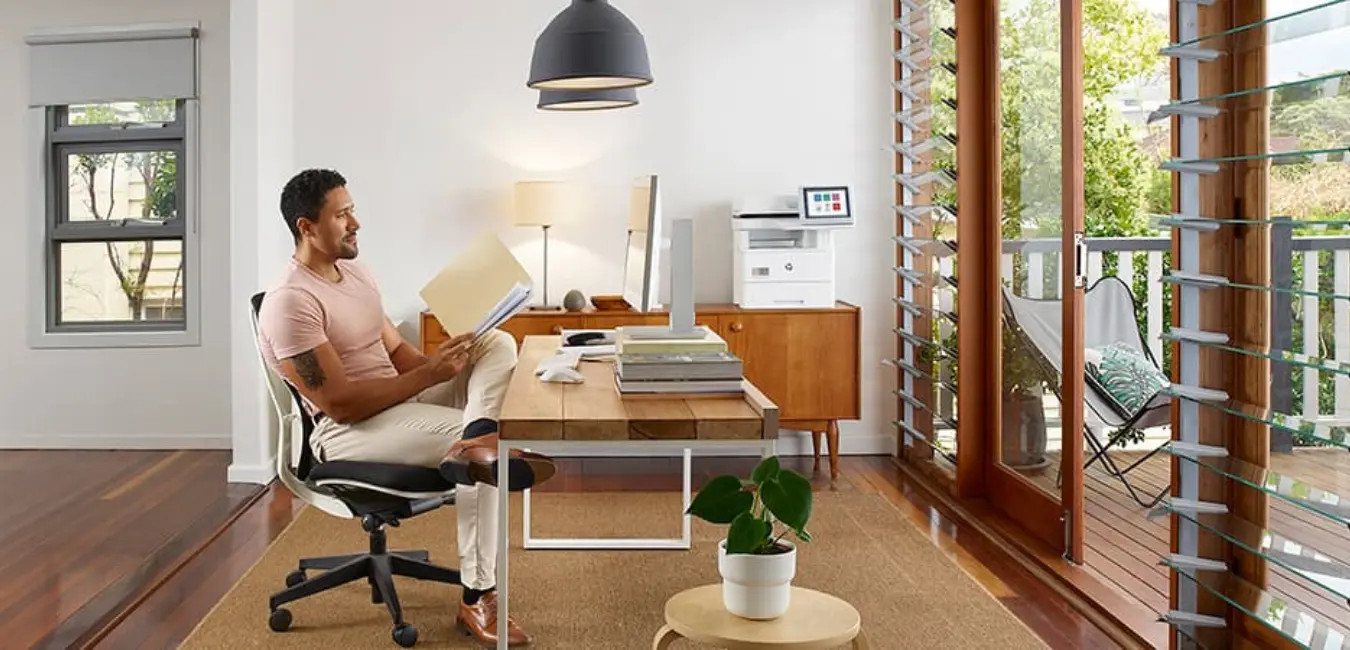
| Indirect Ceiling Uplighting | Positioning smart fixtures to point straight up, using the ceiling as a massive, soft light diffuser. | General room illumination to establish an even background light level. | Low to moderate cost; immediate execution time; minimal effort. |
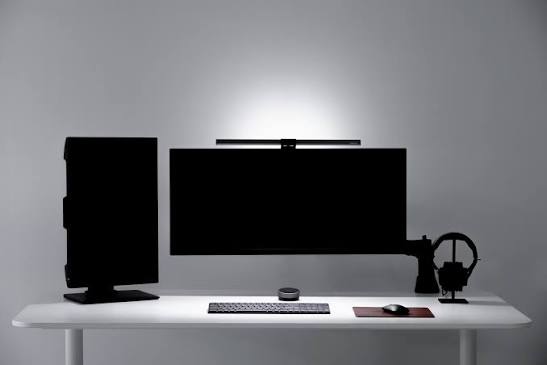
| Asymmetric Task Lighting | Mounting directional bars on top of monitor bezels to project light down while avoiding the glass. | Illuminating the immediate keyboard and document workspace. | Moderate cost; fast mechanical clip setup; low daily effort. |
| Rear Bias Wall Illumination | Adhering smart LED strips behind the monitor to soften the contrast against the back wall. | Reducing eye strain during evening hours or late-night programming blocks. | Budget-friendly; simple tape installation; low ongoing effort. |
| Perpendicular Accent Wash | Placing light fixtures at a strict $90^{\circ}$ angle relative to the screen plane to wash walls with color. | Building visual depth on video calls without throwing reflections onto the screen. | Variable cost; requires strategic room planning; moderate effort. |
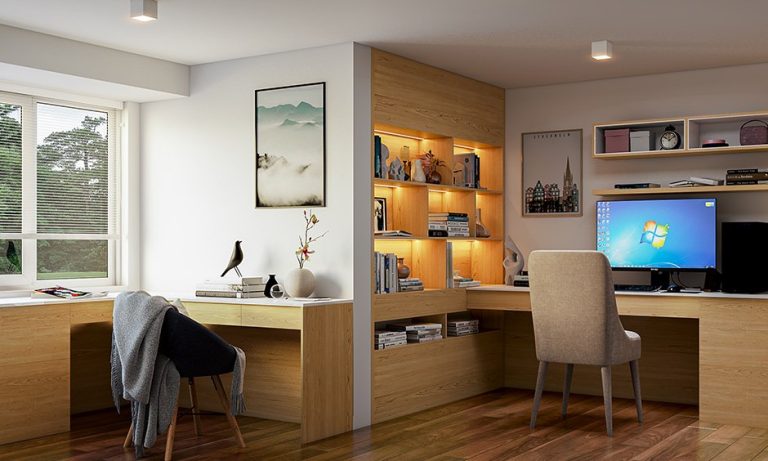
Choosing between these categories depends on your desk placement and room layout. If your desk is pushed flat against a wall, utilizing a combination of rear bias wall illumination and an asymmetric monitor light bar provides a powerful, space-saving setup that eliminates glare. If your desk sits in the middle of a room, relying on indirect ceiling uplighting through tall floor lamps ensures that raw bulb filaments stay hidden from your direct line of sight.
Practical Layout Scenarios and Spatial Applications
The physical architecture of a room dictates how light waves travel and bounce. Below are three common home office scenarios showing how to correctly position your smart lights.
Scenario 1: The Small Room Facing a Light-Colored Wall
This scenario features a compact workspace where the desk is placed flat against a neutral white or light-gray drywall surface, a common layout in spare bedrooms.
-
Actionable Layout Steps:
-
Adhere a high-density, smart RGBW LED strip along the rear perimeter of the monitor housing or desk rim.
-
Adjust the smart app settings to project a soft, neutral-white ($4000K$) glow straight back onto the drywall surface.
-
Place a smart desk lamp on the far side of the workspace, twisting the lamp head completely away from your face to face the wall.
-
-
Why Relevant: Projecting light backward turns the flat wall into a massive, passive mirror. This fills the room with soft, indirect ambient light, eliminating the harsh contrast gap between a glowing screen and a dark backdrop.
Scenario 2: The Open-Concept Space with a Glossy Wooden Desk
This environment involves a desk placed in an open living area or loft space, where the work surface is made of highly polished, reflective wood or glass.
-
Actionable Layout Steps:
-
Clip an asymmetric smart light bar onto the center top bezel of the monitor frame.
-
Adjust the bar’s internal lens rotation so the sharp light cutoff terminates exactly at the front edge of your keyboard, leaving the monitor glass dark.
-
Position a tall floor uplight in the corner of the room, using a smart bulb set to project light straight up onto the ceiling.
-
-
Why Relevant: Glossy desks act like mirrors, reflecting overhead light bulbs straight into your eyes. An asymmetric bar projects light downward at an angle that forces reflections away from your eyes, keeping the work surface clear of hot-spots.
Scenario 3: The Dedicated Multi-Screen Office with Side Windows
A professional operates multiple screens simultaneously in a room that receives bright natural daylight from large side windows.
-
Actionable Layout Steps:
-
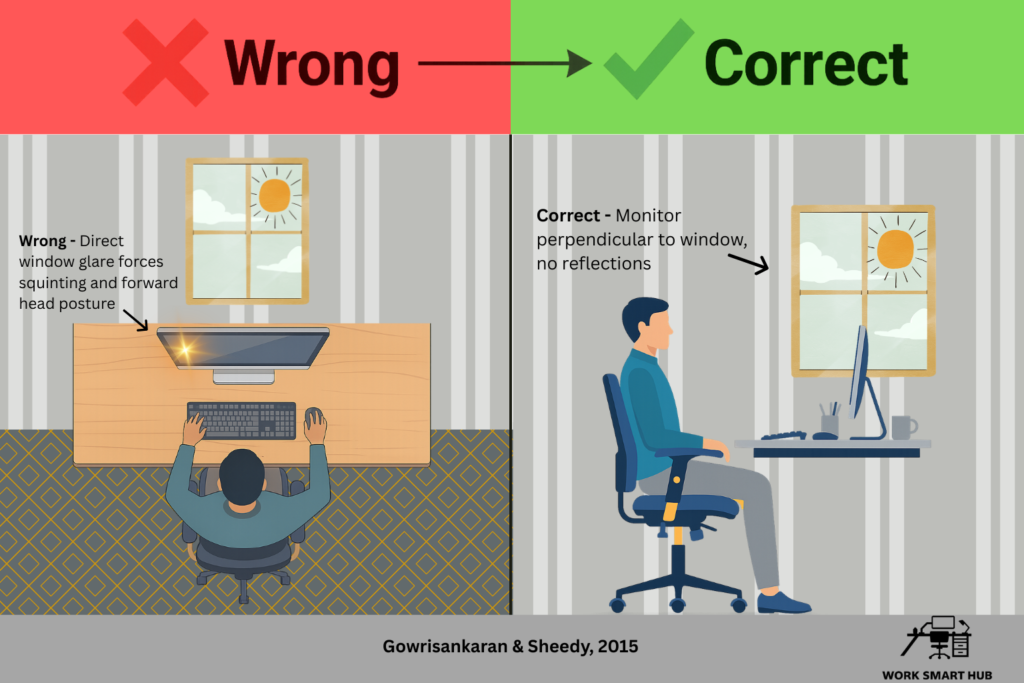
Position your monitors perpendicular ($90^{\circ}$ angle) to the window frame to prevent front or rear sunlight glare.
-
Install smart LED spotlights on a track rail running parallel to the desk, pointing them at a $45^{\circ}$ angle toward the side walls.
-
Link your smart bulbs to an automated daylight tracking schedule that matches indoor light intensity to incoming natural sunlight.
-
-
Why Relevant: Standardizing your room’s light outputs prevents your eyes from having to constantly readjust when looking from a bright screen to a dark corner, lowering muscle fatigue across multi-monitor setups.
Contextual Comparison
These three setups differ based on their primary reflection boundaries. Scenario 1 leverages flat walls to build indirect contrast in a compact space. Scenario 2 manages difficult, glossy table surfaces by using directional lenses to force reflections away from your line of sight. Scenario 3 coordinates artificial lights with powerful, changing natural daylight, showing that your placement strategy must always match your room’s specific layout and materials.
Planning, Tools, and Budget Allocation
Successfully brighting a home office requires systematic planning. Buying expensive smart lamps without mapping out your room’s reflection angles can result in a workspace that remains uncomfortable. Investing in accurate diagnostic tools first ensures you allocate your budget toward high-impact components.
Smart Lighting Implementation Budget Model
| Category | Estimated Amount / Effort | Explanation | Optimization Tips |
| Primary Task Units | $40 – $150 / Low Effort | Asymmetric monitor light bars or adjustable directional desk lamps. | Prioritize models featuring physical control dials or remote pucks to simplify quick brightness tweaks. |
| Indirect Accents | $30 – $80 / Moderate Physical Effort | High-density smart LED tape strips paired with frosted aluminum diffusion tracks. | Always mount flexible LED tape inside an aluminum channel to eliminate raw dot reflections. |
| Diagnostic Meters | $25 – $50 / Low Effort | Digital lux meters to calculate the real-world brightness of your desk space. | Free smartphone camera lux applications can provide a functional baseline reading at zero cost. |
| Smart Control Hub | $30 – $70 / Low Effort | Local network bridges that tie your bulbs together into a single automated schedule. | Select Zigbee or Matter-compatible accessories to keep your automation running locally if your internet drops. |
Note: The cost brackets and material configurations detailed in this guide represent typical consumer options and can change based on your location, chosen technology ecosystem, and specific room dimensions.
Advanced Positioning Features and Control Options
Understanding the engineering of specific components allows users to select high-quality craftsmanship that actively protects their vision.
1. Asymmetric Internal Reflectors
Advanced optical lenses built into monitor light bars that shape light into a precise, forward-angled beam.
-
Advantages: Keeps light completely off the monitor glass; blocks light from shining straight into the user’s eyes; reclaims valuable desk surface.
-
Disadvantages: Requires precise mechanical placement; cheap, lower-tier budget copies often allow light to spill onto the screen.
2. High-Density Diffused LED Tape
Flexible lighting strips engineered with closely spaced diodes covered by a continuous phosphor layer (COB architecture).
-
Advantages: Emits a perfectly seamless line of light without any dark gaps, preventing sharp point-reflections on reflective items.
-
Disadvantages: Consumes slightly more power per foot; more sensitive to sharp folding or twisting during setup.
3. Smart Grouping and Automated Circadian Software
Central applications that automatically alter bulb brightness and color temperatures based on the sun’s natural daily curve.
-
Advantages: Drops blue-light levels automatically in the evening to protect your sleep cycle; maintains smooth room contrast hands-free.
-
Disadvantages: Requires initial software programming and network pairing across your devices.
Common Risks, Omissions, and Placement Mistakes
When setting up your home office lighting, it is easy to make subtle placement mistakes that can lead to eye strain, glare, or persistent headaches.
-
Placing Bare Bulbs in Peripheral Vision: Positioning desk lamps or pendant fixtures so the exposed bulb filament sits inside your side view creates severe direct glare, overstimulating the retina and triggering brow headaches. Mitigation: Always use deep lamp shades, frosted diffusers, or position fixtures behind your monitor plane to keep bare bulbs hidden.
-
Mounting Lights Directly Above the Screen: Installing standard downlights or spotlights straight over your monitor casts high-intensity light paths downward across the display glass, creating a muddy screen with low text contrast. Mitigation: Shift your overhead lights slightly backward or forward, or angle them to wash nearby walls rather than pointing straight down.
-
Leaving the Back Wall Completely Dark: Running a bright computer screen in an entirely dark room forces your eyes to work harder against the high-contrast gap, causing rapid eye strain. Mitigation: Always use low-intensity rear bias lighting to project a soft glow onto the wall behind your monitor, balancing the room’s contrast.
-
Mixing Conflicting Wavelengths: Running a warm yellow smart bulb on one side of your desk while a cold blue screen or window light cuts across the other creates a confusing visual mix that causes rapid eye fatigue. Mitigation: Group your smart bulbs in an app and standardize their color temperature ($4000K$ for daytime focus) across your entire field of view.
Long-Term Maintenance and System Calibration
Sustaining a reliable, healthy lighting environment requires ongoing care, as ambient dust and slow software drifts can degrade your system’s performance.
Ongoing Workspace Calibration Checklist
-
Every Sunday Shift: Wipe your monitor screen and light bar lenses with a dry microfiber cloth; accumulated dust particles scatter light paths and increase glare.
-
Every Three Months: Check your smart app automation settings to ensure seasonal changes in local sunset times are tracking correctly across your bulb groups.
-
Bi-Annually: Check the mounting tape and brackets on your rear desk strips to ensure no components have sagged or shifted into your direct line of sight.
-
Annual System Audit: Use a digital lux meter to re-verify your workspace output levels, as older LEDs can slowly fade over years of continuous operation.
Tracking and Documenting Optical Improvements
Because visual fatigue and muscle strain build up slowly over weeks of use, keeping a brief written record helps you connect changes in your physical comfort straight to your lighting adjustments.
Tips for Keeping a Workspace Log
Keep a simple text note on your computer desktop. Twice a day (ideally once at 10:00 AM and again at 4:00 PM), log your current light layout, the ambient weather outside, and a quick self-reported rating of your focus and eye comfort.
Real-World Progress Records
-
Example 1 (Uncalibrated Baseline Entry): “March 11: Desk pushed flat against a white wall. Using a standard table lamp with an exposed bulb. The light bounces sharply off the center of the screen, creating a washed-out blur. By 3:00 PM, developed dry eyes and a dull brow headache. Comfort rating: 3 out of 10.”
-
Example 2 (Post-Calibration Progress Log): “March 28: Applied the low-glare placement guide. Moved the lamp to bounce light off the wall, and installed an asymmetric monitor light bar. At 4:30 PM, recorded excellent mental clarity and zero eye muscle fatigue. Text on screen looks incredibly crisp. Comfort rating: 9 out of 10.”
Frequently Asked Questions (FAQ)
1. Can a smart bulb completely eliminate glare on a glossy monitor?
A smart bulb can lower eye strain by letting you adjust brightness and warm up color profiles, but it cannot fix glare if it is placed in the wrong physical position. To completely eliminate glare, you must combine smart adjustments with geometric placement—positioning the bulb so its light waves reflect safely away from your line of sight ($\theta_i = \theta_r$).
2. What is the best wall color behind a monitor to prevent glare?
To minimize glare and maintain comfortable room contrast, paint the wall behind your monitor a light, neutral tone like off-white, light gray, or soft beige. Use a flat or matte finish paint. Avoid high-gloss or eggshell finishes, as shiny paints turn your wall into a mirror that reflects hot-spots from your smart bulbs.
3. How many lux do I need on my desk surface for comfortable typing?
For standard office computer tasks and document reading, aim for an even surface illumination level between 300 and 500 lux across your immediate keyboard and desk workspace. This provides enough brightness to keep text sharp and readable without feeling blinding or casting distracting reflections off your screen glass.
Closing Summary
In conclusion, establishing the best workspace comfort depends on utilizing a strategic mix of indirect lighting layers and precise reflection angles. By mounting smart LED strips to wash your background walls with soft, indirect light and using directional asymmetric light bars over your keyboard, you can easily discover how to place smart lights in home office for low glare. Combining these smart placement principles with regular equipment care ensures a comfortable, healthy, and highly focused home workspace over the long term.